Table of Contents
ToggleA bathroom slip can mean a broken hip, lost independence, and months of recovery. For seniors aging in place, the bathroom ranks among the highest-risk rooms in the home. Yet thoughtful design changes, grab bars, slip-resistant flooring, better lighting, and accessible fixtures, transform a danger zone into a safe, dignified space. This guide covers seven practical upgrades that respect both function and aesthetics, letting seniors maintain their routine without fear. Whether you’re retrofitting a parent’s bathroom or planning ahead for yourself, these improvements balance accessibility with the everyday comfort that makes a house feel like home.
Key Takeaways
- Bathroom design for seniors prioritizes fall prevention through grab bars, slip-resistant flooring, and improved lighting to reduce the risk of hip fractures and lost independence.
- Grab bars rated for 300–500 pounds must be anchored directly to wall studs at strategic locations near toilets and tubs to provide reliable support during the riskiest bathroom transitions.
- Slip-resistant flooring with a coefficient of friction of 0.6 or higher, combined with proper underlayment and grout, creates a safer foundation and prevents water damage that undermines accessibility upgrades.
- Accessible fixtures like raised toilet seats, single-lever faucets, curbless showers, and widened doorways enable seniors to maintain independence while reducing reliance on caregivers.
- Strategic layered lighting with 75–100 foot-candles, motion-activated switches, and nighttime path lighting compensates for age-related vision changes and prevents nighttime falls.
- Most bathroom design improvements for seniors cost significantly less than hospital care and can retrofit seamlessly into existing spaces without requiring a complete renovation.
Why Senior-Friendly Bathrooms Matter
Bathrooms pose unique risks for older adults. Wet tile, slippery tubs, and poor lighting combine with balance changes and reduced reaction time to create a hazard multiplier. The CDC reports that one in four Americans aged 65 and older suffers a fall each year, and many of those happen in bathrooms.
Beyond safety, accessible design supports dignity. Grab bars and curbless showers let seniors maintain independence longer, reducing reliance on caregivers for basic hygiene. Strategic lighting cuts glare and shadows that confuse depth perception. Wider doorways and lower fixtures ease movement for those with mobility aids.
The good news: most upgrades cost far less than a hospital stay and don’t require gutting the room. Many retrofit seamlessly into existing layouts. Think of these changes as preventative medicine, an investment in confidence and peace of mind that pays dividends every single day.
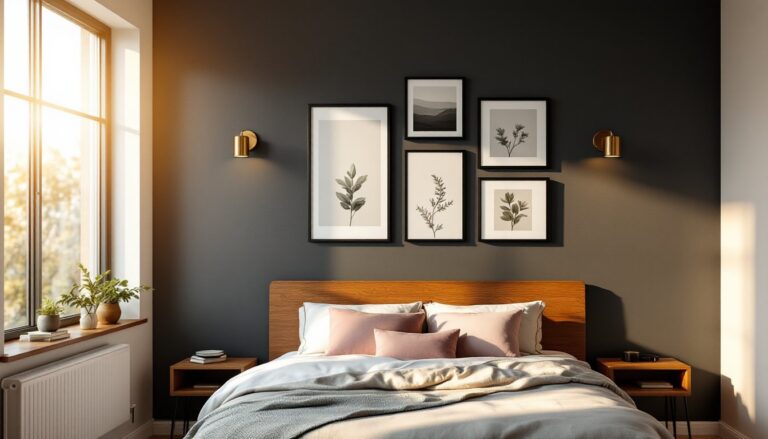
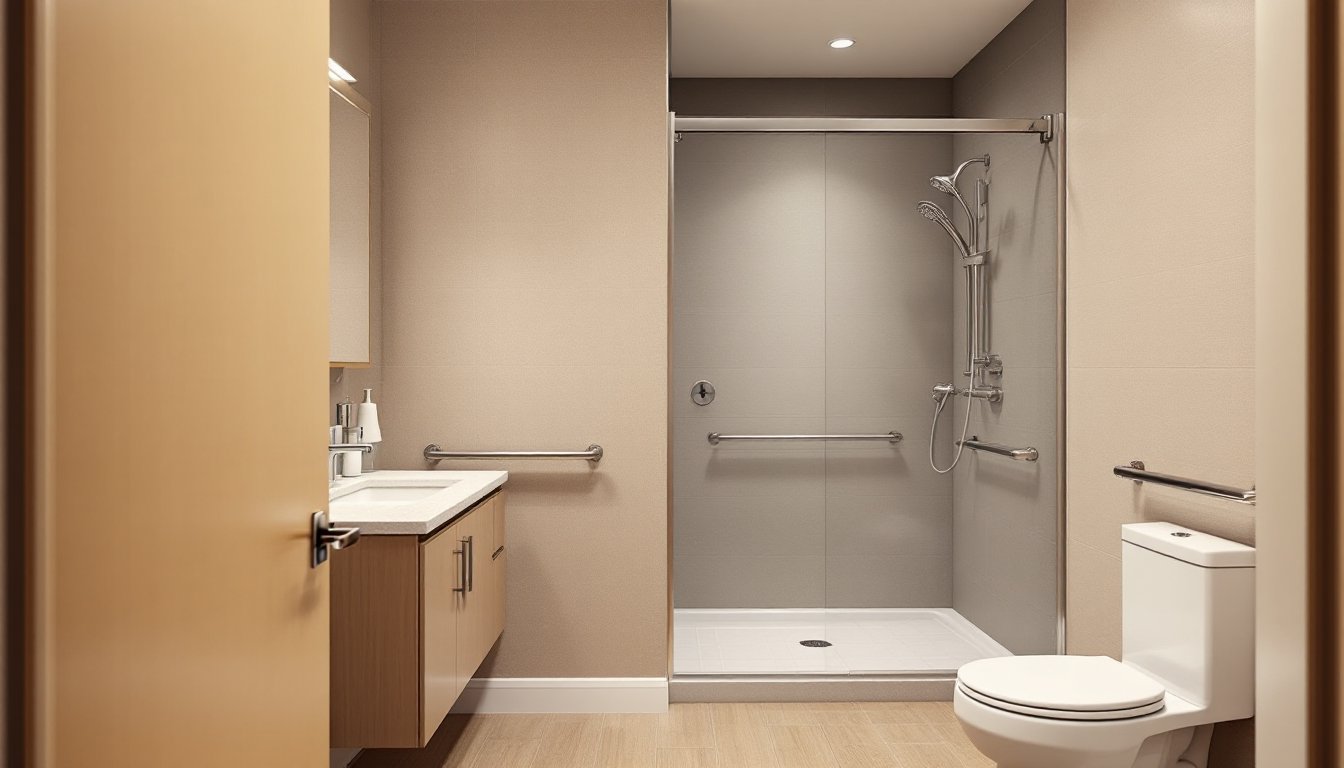
Install Grab Bars and Handrails
Grab bars aren’t just for nursing homes, they’re load-bearing insurance in any bathroom. A correctly installed bar supports body weight during the riskiest moments: entering and exiting the tub or shower, and sitting on or rising from the toilet.
Choosing the Right Bar: Look for bars rated for 300–500 pounds of static load (not the same as momentary grip strength). Stainless steel, coated aluminum, or brushed nickel options resist corrosion and feel secure in wet hands. Avoid polished chrome, it’s slippery when wet and shows fingerprints constantly. Bar diameter matters too: 1.25–1.5 inches fits most hands comfortably without requiring a death grip.
Material and Mounting: The real strength comes from what’s behind the bar. Bars must anchor directly to wall studs, not drywall alone. If studs don’t align with your ideal placement, use heavy-duty mounting blocks (Grab Bar Firestop Backing Plates work well) installed between studs during renovations, or install blocking from inside the wall if access allows.
Placement and Installation Best Practices
Vertical bars near the toilet prevent falls during the sit-down and stand-up transitions. Mount one on each side at 33–36 inches from the floor, 12–24 inches from the toilet center.
Tub and shower bars work best in multiple locations. Install horizontal bars 38–48 inches above the tub floor on the long wall (for pulling oneself in and out) and a vertical bar near the entry point. The American with Disabilities Act (ADA) guidelines recommend bars 1.5 inches from the wall, close enough to grab but far enough to get fingers behind comfortably.
Installation steps:
- Locate studs with a stud finder.
- Mark mounting holes level and square using a laser level or spirit level.
- Drill pilot holes slightly smaller than the mounting screws (prevents cracking in tile).
- Use corrosion-resistant screws rated for the bar’s weight capacity.
- Test the bar with firm downward and lateral pressure before allowing full use.
Avoid adhesive-only bars in wet areas, they fail under repeated stress and wet conditions. In rental situations where stud mounting isn’t allowed, heavy-duty adjustable tension bars (less ideal but functional) bridge corner-to-corner in showers, though they won’t support a full fall.
Upgrade Flooring for Slip Prevention
Wet bathroom floors are the silent culprit behind countless falls. A towel might soak up puddles, but a senior with balance issues needs flooring that grips, period.
Best Options for Slip Resistance: Textured tile with a coefficient of friction (COF) rating of 0.6 or higher passes the wet test. Porcelain tile with a matte or textured finish (not polished or glazed) works well and stands up to moisture. Non-skid flooring, rubber composite or luxury vinyl plank (LVP) with textured surfaces, offers excellent grip and comfort underfoot.
Cork and bamboo look nice but absorb water and degrade over time in bathrooms. Avoid high-gloss finishes, marble, and polished stone, no matter how beautiful. Grout matters too: use epoxy or urethane-based grout instead of standard cement-based. It resists mold and won’t harbor moisture that invites mildew and stains.
Installation and Prep: Proper underlayment (typically a 1/4-inch cement board or waterproof membrane) prevents water from seeping between tiles and damaging subfloors. This is where most DIY work goes wrong, rush the prep, and you’re fixing rot in a year.
If replacing flooring feels overwhelming, peel-and-stick non-skid tape applied strategically to existing tile extends safety for a fraction of the cost. It’s temporary but effective, especially in rental situations.
Consider floor heating in cold climates too, electric radiant heat warms tile and makes the room more inviting for older joints, plus it dries the floor faster after showers.
Choose Accessible Fixtures and Layouts
Standard bathroom fixtures assume average height and mobility. Small adjustments unlock big safety gains.
Sink and Counter Height: Vanities at 30–36 inches (standard is typically 30–32 inches) allow seated access for users in wheelchairs or with mobility aids. An undermount or pedestal sink (without a bulky base) provides knee clearance and feels less cramped. Single-lever faucets beat two-handle designs, easier to operate with arthritis or one hand. A touchless or lever-handle faucet eliminates fumbling with knobs.
Toilet Modifications: A raised toilet seat (adding 4–6 inches in height) dramatically reduces the strain on hips and knees during the sit-down and stand-up. Models with built-in armrests ($150–$400 range) provide extra security. Taller toilets (17–19 inches) are now manufactured as standard comfort-height options and pair well with grab bars. An automatic bidet seat adds dignity and independence for those with limited mobility.
Doorway Width: Interior bathroom doors typically swing 28–32 inches clear. If space allows, widening to 36 inches accommodates a walker. This may require relocating the door frame, a structural change that needs planning but pays dividends in accessibility.
Walk-In Showers and Tub Modifications
Curbless Showers (zero-threshold or ramp entry) eliminate the trip hazard of a 7–8-inch curb. A gentle slope (1/8 inch per foot) directs water toward a linear drain rather than pooling at the edges. This style costs more upfront but simplifies aging in place dramatically.
If a full curbless renovation isn’t feasible, a low-profile threshold or ramp kit ($200–$800) bolts over the existing curb, reducing height to 2–3 inches. Not perfect, but more manageable than a full step.
Tub Conversions: Soaking in a tub becomes risky for older adults, getting in and out is hard on joints and balance. A walk-in tub (essentially a low-entry door with a seat inside) costs $3,000–$15,000 but eliminates climbing over an edge. The door seals and fills the tub, letting users soak safely. For budget-conscious projects, a hand-held showerhead on a height-adjustable rod ($50–$200) lets seated or standing users shower comfortably without a major renovation.
Slopes and drainage matter: bathroom remodeling guides from This Old House cover these technical details thoroughly. Proper sloping prevents standing water and mold growth that undermine accessibility work.
Improve Lighting and Visibility
Dim bathroom lighting compounds balance issues and turns obstacle detection into guesswork. Aging eyes need roughly three times more light than younger ones to see the same detail.
Brightness and Placement: Aim for 75–100 foot-candles (800–1,000 lumens) in the main bathroom area. This is brighter than a typical builder-grade fixture provides. Layer your lighting: bright overhead fixtures (LED recessed or flush-mount at 4,000–5,000 color temperature, which feels natural and alert), vanity lights on either side of the mirror, and a nighttime option like motion-activated LED strips along the floor or baseboards.
Motion Sensors and Switches: Reachable switch placement, no more than 48 inches from the floor, matters for anyone with limited reach or balance issues. A motion-activated light (sensor-equipped recessed fixture, $30–$100 installed) turns on automatically, eliminating fumbling in the dark. Pair it with a traditional switch as backup.
Avoiding Glare: Glossy surfaces bounce light harshly, confusing depth perception. Use matte finishes on walls and vanities, and consider diffusers on overhead fixtures. Warm LED bulbs (2,700K) feel more soothing than cool whites and reduce eye strain during evening routines.
Contrast and Signage: Bright grout between tiles, high-contrast towel bars, and clearly marked light switches help older eyes navigate. Design inspiration from Houzz’s age-proof bathroom article shows how lighting and color choices work together.
Don’t forget a nightlight or low-level path lighting, seniors often use the bathroom at night, and a stumble during a midnight visit can be catastrophic.